Factorio Blueprints Version 3
Overview
These blueprints have been updated for Space Age.
All of the Nauvis blueprint include roboports, even early game ones where you wouldn't have roboports yet. I find it's easier to plan ahead then try to wedge in roboports later.
Inserters with filters are included in the blueprints only to indicate where resources should be sent in (you do not need to actually build the inserters).
Passive provider chests are used in all blueprints with chests, even if the blueprint is something you'd need to make early game (when you wouldn't have any passive provider chests). The reasoning for this is simple: if you are placing the blueprint manually, you can just put down a different box, but if robots are placing it down then you should already have a passive provider chest. Also, in just about every case, if you place down a different box early in the game, you'll want to eventually replace it with a passive provider chest.
Most of the Nauvis blueprints have efficiency module 1s in them. This seems like a simple thing to throw in that has very little downside.
I haven't used higher quality items in any of the blueprints, because I don't want to assume you have them.
But, Dude, Can't You Just Give Me All The Blueprints At Once In A Single Book?
But then you'll miss all of my fun and witty commentary on each blueprint below! You don't actually want that, do you?!
Yes, I Do, Just Give Me The Dang Blueprints
All right, fine, here's a link to a file with the import string for everything in one big book: All Blueprints
(Are you happy now? Now you'll never see my funny descriptions. The one for distractor capsules was really good, too!)
Power
Solar Panel Block with Walkway

A tileable solar panel block with a built-in walkway (or, driveway, I suppose). The ratio is as close to the ideal .84 as possible without wasting space.
Blueprint
Solar Panel Block

Maximum density. Minimum ... uh ... walkity.
Blueprint
Nuclear Power

This can generate up to 480MW and won't waste fuel. You can place one fuel cell in the bottom right reactor to start it up (or one in each should be fine, too). More fuel cells will only be added when the stored power gets low enough. This requires 8 pipes of water even though you can theoretically use only five, but, hey, water is cheap.
Blueprint
Fusion Power (400MW)

You'll need to kick start this with a bit of fluoroketone, but once you're done that it'll hum along just fine!
Blueprint
Fusion Power (1.2GW)

MOAR POWER!
Blueprint
Miscellaneous
Robot Extension

Easily extend your robot network with this blueprint.
Blueprint
Robot Extension 2x2

A 2x2 blueprint for even more easily extending your robot network.
Blueprint
Robot Extension 3x3

3x3 equals 9. So. Yeah.
Blueprint
Mining

A bunch of different-sized mining blueprints I find useful. One of these should cover just about any mining field.
30x4 Miners, Yellow Out
30x5 Miners, Red Out
30x6 Miners, Red Out
30x7 Miners, Red Out
30x8 Miners, Red Out
60x4 Miners, Red Out
60x5 Miners, Red Out
60x6 Miners, Red Out
60x7 Miners, Red Out
60x8 Miners, Red Out
60x5 Miners, Blue Out
60x6 Miners, Blue Out
60x7 Miners, Blue Out
60x8 Miners, Blue Out
Resources
Stone Smelter Line

These will smelt a full yellow belt and can be easily tiled vertically. You can choose between the coal line going up, going down, or being fed by a box (for very early game). You can also choose between input and output being on the same side or different sides.
Coal from above, output/input opposite sides
Coal from above, output/input same side
Coal from below, output/input opposite sides
Coal from below, output/input same side
Box-fed coal, output/input opposite sides
Box-fed coal, output/input same side
Steel Smelter Line

Just like the stone smelter lines but steeler and morerer and redererer.
Coal from above, output/input opposite sides
Coal from above, output/input same side
Coal from below, output/input opposite sides
Coal from below, output/input same side
Electric Smelter Line

Smelts a full yellow, red, or blue belt using electric furnaces, with the option to have the input on the same side or opposite sides.
Yellow belt, output/input opposite sides
Yellow belt, output/input same side
Red belt, output/input opposite sides
Red belt, output/input same side
Blue belt, output/input opposite sides
Blue belt, output/input same side
Basic Oil Processing
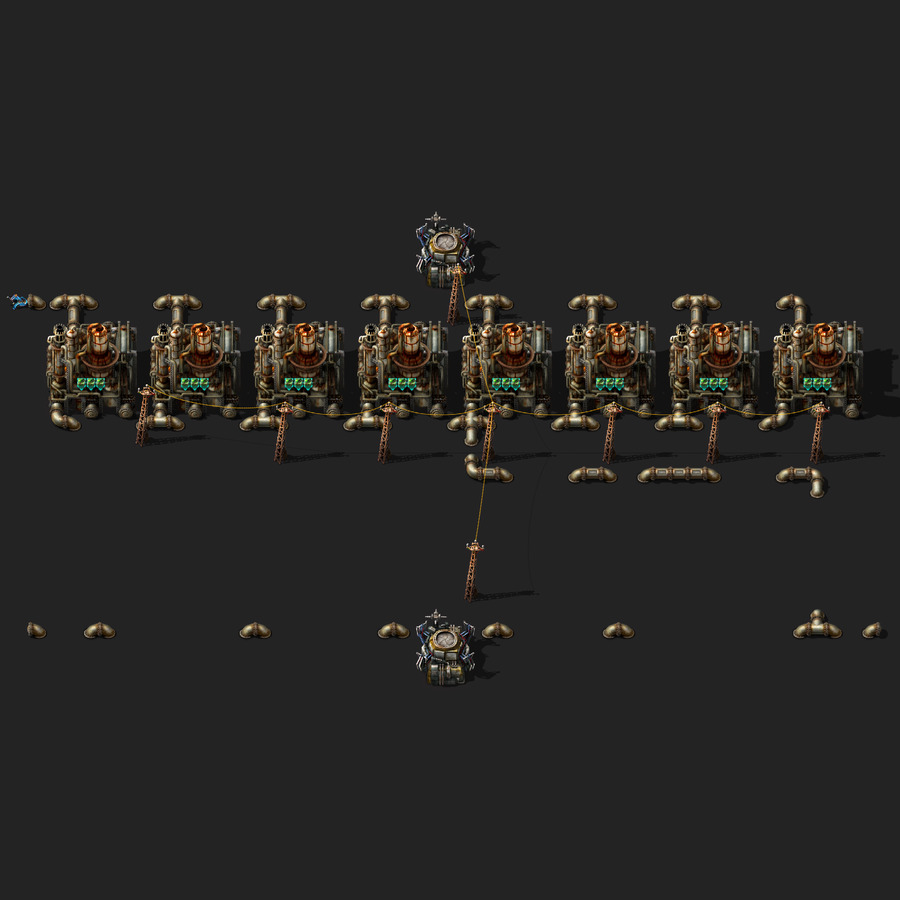
This will do basic oil processing. It's a bit weird space-wise because it's designed to be upgraded to the "Advanced Oil Processing" blueprint below.
Blueprint
Advanced Oil Processing

This output petroleum, light oil, and lubricant. If the lubricant backs up then so will the heavy oil, and if the heavy oil backs up the excess will be sent to light oil cracking. Likewise, the light oil backs up, it will be converted to petroleum. If the petroleum backs up--well then you're in good shape, eh?
Blueprint
Coal Liquefaction

Make that coal into precious oil! Ouputs petroleum, light oil, and lubricant. You'll need to kick start the steam producing with a few pieces of coal or solid fuel. You'll also have the kick start the heavy oil with a few barrels--you can dump them into the assembling machine and, once everything is going, you can remove the assembling machine.
Blueprint
Solid Fuel

This might look like an odd number of chemical plants (21), but that's because it's designed to completely consume light oil from the advanced oil blueprint.
Through
In-Out
Rocket Fuel

Rocket fuel. Similar to the solid fuel, this is designed to fully-consume the light oil output of the advanced oil processing blueprint.
AM2 Through
AM2 In-Out
AM3 Through
AM3 In-Out
Uranium Processing
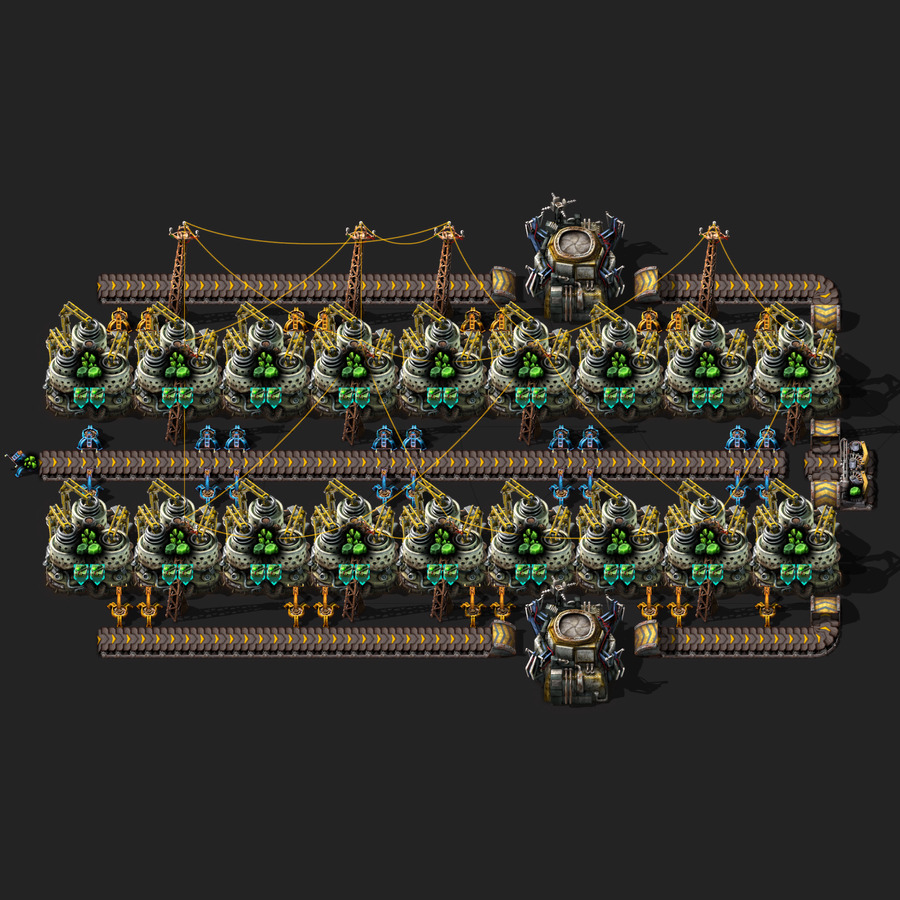
Consumes either a yellow, red, or blue belt of uranium ore and outputs uranium-235 and uranium-238.
Through Yellow Belt
In-Out Yellow Belt
Through Red Belt
In-Out Red Belt
Through Blue Belt
In-Out Blue Belt
Kovarex Enrichment

I hate this blueprint. It works almost by accident and it doesn't scale up well. But even though I hate it, you should probably use it first before the other one below. It does a surprisingly good job of getting Kovarex enrichment going without too much waste. But as you expand it some of the centrifuges will end up needing to get to 80 uranium-235 in waiting before they start outputting.
Blueprint
Kovarex Enrichment

This is better than the other kovarex enchriment blueprint. It's compact, efficient, and can tile forever. You could also beacon it easily (But don't put productivity modules in! They won't work!). BUT you have to manually feed in the first 40 uranium-235 to every centrifuge. So the other blueprint might be better to use early as it's a bit more set-it-and-forget-it.
Blueprint
Nuclear Fuel

This will consume all of the output of the "Rocket Fuel" blueprint and convert it into nuclear fuel ... assuming you can provide the uranium-235!
Through
In-Out
Train Segments
Straight Segment

A simple tile-able train segment.
Blueprint
Turn Segment

Makes the trains go different ways. Choo choo.
Blueprint
U-Turn Segment

Sometimes a train is like, "Meh, I don't even want to go this way, I want to go the other way." So like, this like, does that. Like.
Blueprint
Diagonal Segment

A simple, tile-able train segment that goes diagonally.
Blueprint
Diagonal Turn Segment

Diagonal trains need to turn, too.
Blueprint
Diagonal U-Turn Segment

If a train going diagonally turns around, it's still going diagonally. So the opposite of diagonal is diagonal! Who knew?
Blueprint
Straight-to-Diagonal Segment 1

This can be used to go from a straight train segment to a diagonal one.
Blueprint
Straight-to-Diagonal Segment 2

This can be used to go from a straight train segment to a diagonal one.
Blueprint
Waiting Area

You can put this in front of a busy stop or depot to give trains somewhere to wait. It's not the most space-efficient version of this but it tiles well with the other blueprints. (Hey? Want to know a secret? I was hoping all the train "enhancements" from Spage Age would make this more space efficient. But guess what? They didn't! It's actually worse than it used to be! Grrrrr!)
Blueprint
Train Crossing

This uses rail chain signals to keep things reasonably efficient without deadlocking.
Blueprint
Train 4-Way Intersection

Again, chain signals are used to keep things fairly efficient. Also, the intersection blueprints are designed such that if you tile them next to each other, trains will wait until they can go through the entirety of all intersections before entering the first one, which should help with deadlocks and such.
Blueprint
Train T Intersection

Here, your happy train-going residents can take a break to have some tea, maybe some biscuits--oh hold up it's T not tea my bad.
Blueprint
Diagonal Train Crossing

Don't cross these trains! Oh wait. Do. Do cross these trains. It's okay, the intersection will take care of it.
Blueprint
Diagonal Train 4-Way Intersection

Can we just take a moment to acknowledge how pretty this is? I mean, it's pretty. Real pretty. I took great pains to make it so you could rotate it any way and it would still be the same (except for that power poll in the middle that will rotate around the roboport). But you probably didn't even notice that, did you? I worked so hard on it! But you'll never know! You probably aren't even reading this! I'm talking to myself on the internet and it's sad but also dang that intersection is pretty, amiright?
Blueprint
Diagonal Train 3-Way Intersection

For when you want an intersection but you have an irrational fear of even numbers like 4.
Blueprint
Train Y Intersection 1

Like the T intersection except it goes between two diagonal segments and a straight segment.
Blueprint
Train Y Intersection 2

Like the T intersection except it goes between two straight segments and a diagonal segment.
Blueprint
Train Stops
Train Stop

This supports a train sized with one engine and two cars. Actually all of my blueprints kind of assume that. If you're just finding this out and you're like, "Oh no! I use bigger trains these blueprints are useless to me!" then I'm very sorry.
Blueprint
Train Stop With Waiting Area

This train stops features a few waiting areas. You can use this for a busy stop with multiple trains going to it to keep them from clogging up the tracks.
Blueprint
Solid Load

This can be plopped down on top of a train stop for easy solid loading. Also, "Solid Load" sounds like a joke about poo and I apologize for that.
Red Belts
Blue Belts
Solid Unload

Put this down on top of the train stop blueprint for quick solid unloading. And yes, Solid Unload" sounds even more like a joke about poo. At least it's not Liquid Unload. Oh, wait, that's farther below.
Red Belts
Blue Belts
Liquid Load

Quickly loads two fluid wagons. Also, ew.
Blueprint
Liquid Unload

Quickly unloads two fluid wagons. Also, eeeeeeeeewwww.
Blueprint
Train Depot
Train Depot (Basic)

An infinitely expandable train depot! This basic version is easier to build by hand, but I suggest upgrading to the advanced version below once you have robots building it for you.
Blueprint
Train Depot (Advanced)

An upgrade to the basic version that allows any train waiting area to go to any train station. This does a good job of keeping the trains moving, even if one or more of the stations are very busy. You can expand it forever.
Blueprint
Train Depot Expansion

Expands the advanced depot.
Blueprint
Depot Solid Unload

Unloads solid goods from trains in the depot.
Red Belts
Blue Belts
Depot Solid Load

Loads sold goods into trains in the depot.
Red Belts
Blue Belts
Depot Liquid Unload

Unloads liquid from fluid wagons.
Blueprint
Depot Liquid Load

Loads liquid into fluid wagons.
Blueprint
Train Roundabouts
Train Roundabout

A lot of people hate on roundabouts. But not me, man. I'm not judging. You do you.
Blueprint
Train 3-Way Roundabout

Like the roundabout but only 3-way.
Blueprint
Train 2-Way Roundabout (Through)

Pound on the ground for going through or around but never up nor down.
Blueprint
Train 2-Way Roundabout (Turn)

I get really tired of writing these descriptions. Do you get tired of reading them?
Blueprint
Diagonal Train Roundabout

A roundabout with diagonal entrances and exits.
Blueprint
Diagonal Train 3-Way Roundabout
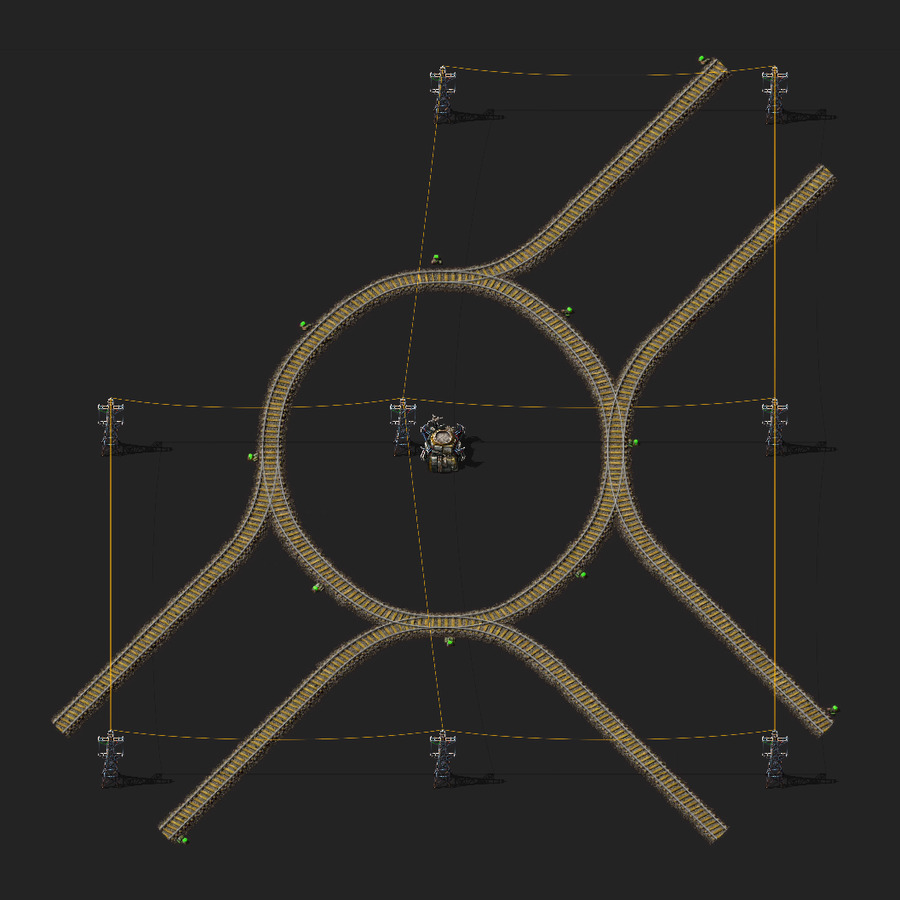
What did the tie say to the hat? You go on a-head, and I'll just hang around! What does that have to do with this blueprint? Nothing at all.
Blueprint
Diagonal Train 2-Way Roundabout (Through)

It's like that other roundabout except it has less thingies.
Blueprint
Diagonal Train 2-Way Roundabout (Turn)
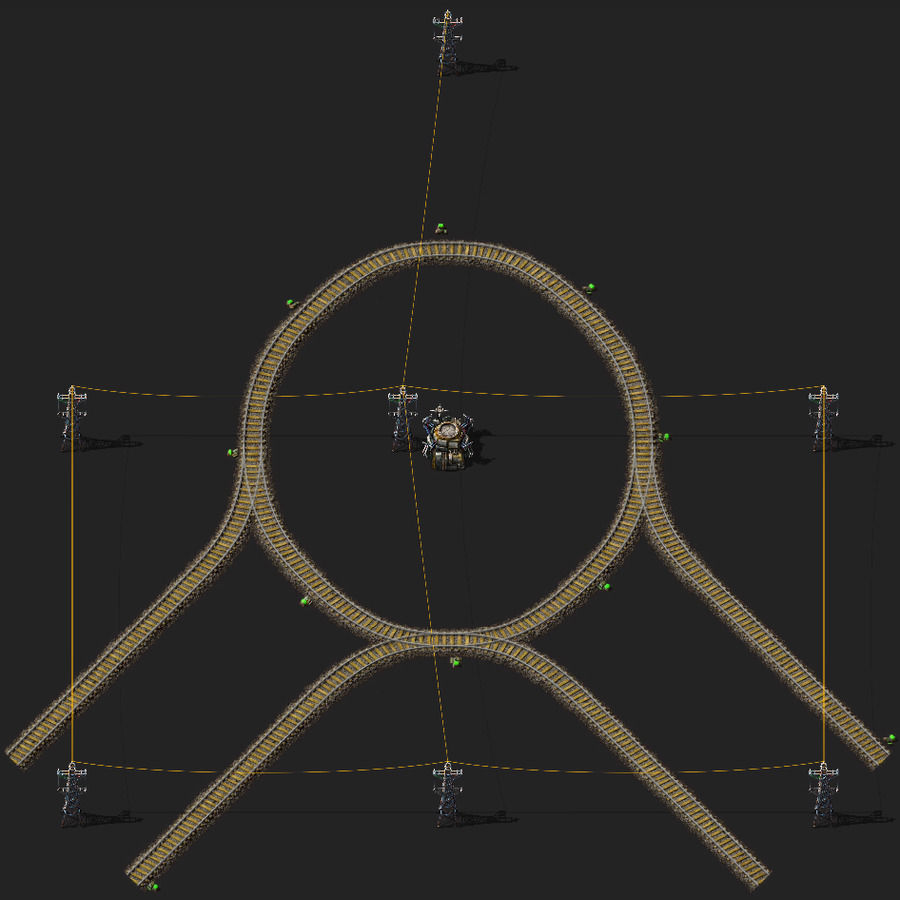
If you squint this looks like an alien spaceship.
Blueprint
Train 8-Way Roundabout

I know what you're thinking. "When would you ever need something like this? Does it even work? Could it deadlock?" The answer is simple: Leave me alone and stop asking so many questions!!
Blueprint
Train Refueling & Prioritizing
Train Refueling

You can put one of these down at a train station to have robots bring fuel to refuel any trains that go by. Each requestor chest requests enough fuel to fill up two trains (6 inventory spaces worth).
Coal
Solid Fuel
Rocket Fuel
Nuclear Fuel
Unload Prioritizer (Solid)

These make managing trains a lot easier. For example, if you have two iron plate stations and you name them the same thing, trains whill choose which one to go to by priority. This ensures stations with fewer items in the boxes get higher priority. There are two options: one is for items with a stack size of 50 (like iron ore) and the other is for items with a stack size of 100 (like iron plates).
For Items with a stack size of 50
For Items with a stack size of 100
Load Prioritizer (Solid)

Like the unload prioritizer, except for stations where you are loading items into a train. The stations with more items in the boxes will get prioritized by trains above those with fewer.
For Items with a stack size of 50
For Items with a stack size of 100
Unload Prioritizer (Liquid)
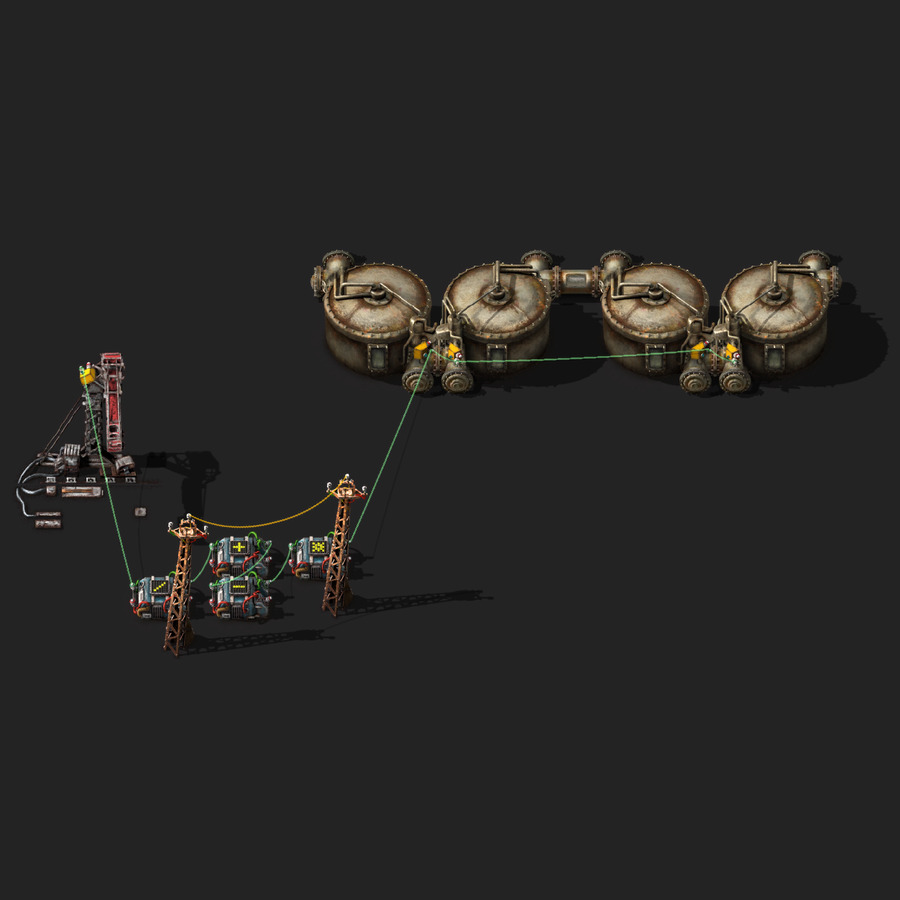
Same as the solid unloader prioritizer, except for liquid wagons.
Blueprint
Load Prioritizer (Liquid)

Same as the solid loader prioritizer, except for liquid wagons.
Blueprint
Base
Basic Stuff

A bunch of useful very early game things. I tried to have this more-or-less prioritize the things you'll be most in need of. This includes some personal gears and green circuits which might be helpful as you manually create things.
Assembling Machine 1
Assembling Machine 2
Assembling Machine 3
Fast Inserters

This makes fast inserters. But does it make fast inserters fast? Or fast fast inserters? Or fast fast inserters fast? No, of course not, there are no fast fast inserters you n00b!
Assembling Machine 1
Assembling Machine 2
Assembling Machine 3
Assembling Machine 2s

You can have your assembling machine 2 in any color, as long as it's blue.
Assembling Machine 2
Assembling Machine 3
Steel Poles and Furnaces

I steel got it!
Assembling Machine 2
Assembling Machine 3
Red Belts

I feel like I'm always hurting from red belts just after they are researched, so this is designed to produce them at a pretty decent pace.
Assembling Machine 2
Assembling Machine 3
Floors and Gates

This makes refined concrete at a decent pace. I also threw in gates because you unlock them around this time and I don't know where else to put them.
Assembling Machine 2
Assembling Machine 3
Trains!

Trains! For all your train-related needs. I also threw in a box to hold some personal engines in case you need them to build a car or tank or something.
Assembling Machine 2
Assembling Machine 3
Oil Stuff

This is everything you need to get basic oil running. It doesn't produce pipes because my Basic Stuff blueprint does that already.
Assembling Machine 2
Assembling Machine 3
Bulk Inserters

Makes bulk inserts in bulk. Or at least in normal. I mean, they stack in a chest so that kinda feels bulky. I dunno.
Assembling Machine 2
Assembling Machine 3
Circuit Stuff

Imma be honest with you: there are whole sets of things in here I've never really used. I've played so much factorio and yet I still feel like a n00b.
Assembling Machine 2
Assembling Machine 3
Solar, Accumulators, and Substations

This produces solar panels and accumulators at about the ideal ratio. I also threw in substations because I find they're very helpful when you're doing solar.
Assembling Machine 2
Assembling Machine 3
Robots

This will produce logistics and construction robots at a decent pace and place them directly into a roboport. It also creates roboports, chests, and a few intermediates for personal use. It takes a little to get going, mostly because the chests production part gets a bit greedy, but nevertheless it produces pretty well.
Assembling Machine 2
Assembling Machine 3
Electric Furnaces

I'm getting tired of writing these. Are you getting tired of reading these? This thing makes electric furnaces, okay? What else can I say? Why are you still reading this? Move on, man! Move on! Or ... woman. Move on, woman! Just, whoever you are, move on.
Assembling Machine 2
Assembling Machine 3
Assembling Machine 3s

I like this blueprint. It's kinda symmetrical and pretty. It makes assembling machine 3s and consumes an entire yellow copper belt to make one every 12 seconds or so (assuming you are producing them with assembling machine 3s).
Assembling Machine 2
Assembling Machine 3
Nuclear Items

This big ol' thing will produce everything you need to get nuclear up and running. It's extremely resource hungry and still takes a while to output what you'll need. But once you have nuclear going, it should eventually fill up and mostly sit idle.
Assembling Machine 2
Assembling Machine 3
Blue Belts

For when you have the NEED for SPEED and also the THIRST YOU CAN'T SLATE to GOBBLE UP IRON PLATES!
Assembling Machine 2
Assembling Machine 3
Robochests

Makes more roboty things.
Assembling Machine 2
Assembling Machine 3
Beacon of Hope

This is enough to keep one assembling machine continuously producing beacons. Is that enough? That's probably enough. I dunno maybe you super late game people would scoff at it.
Assembling Machine 2
Assembling Machine 3
Military
Basic Military Stuff

Creates useful early military thingamabobs.
Assembling Machine 1
Assembling Machine 2
Assembling Machine 3
Military 2

Grenades! Show those trees whose boss! Oh, I guess this also makes ammo for bugs, meh, whatever. Stupid trees.
Assembling Machine 2
Assembling Machine 3
Flamethrower Turrets and Ammo

Listen, sometimes you just gotta burn stuff, like trees, or alien bugs that are just trying to defend their environmental paradise of a homeland from a smaug-producing psychopath who's willing to wipe out their entire planet just to leave in a rocket, only to decide he doesn't want to leave afterall because he's having too much fun destroying their planet. I mean, what if the alien-equivalent of Captain Planet shows up? You gotta burn him, you know? You just gotta burn him.
Assembling Machine 2
Assembling Machine 3
Landmines Not Yours

Makes the hidden booms.
Assembling Machine 2
Assembling Machine 3
Bust a Cap(sule)

Makes capsules. You can bust 'em.
Assembling Machine 2
Assembling Machine 3
Rockets

I know what you're thinking, because it's the same thing I'm thinking. It's the same thing we're all thinking: EXPLOSIONS!
Assembling Machine 2
Assembling Machine 3
Explosive Rockets

Slap this down on top of the Rockets blueprint to expand it or just put this down solo, either works.
Assembling Machine 2
Assembling Machine 3
Laser Turrets

Pew Pew
Assembling Machine 2
Assembling Machine 3
Cannon Shells

Ammo for your lovely tank.
Assembling Machine 2
Assembling Machine 3
Military 4

Cluster grenades and piercing shotgun shells.
Assembling Machine 2
Assembling Machine 3
My-I-Mean-Ur-anium Ammo

It's neat how inexpensive this stuff is once you get uranium up and running.
Assembling Machine 2
Assembling Machine 3
Artillery

Makes the biggest booms.
Assembling Machine 2
Assembling Machine 3
Defender Capsules

Robots don't have souls, so remember that when you watch them plummet to the ground after their tiny little bit of life runs out.
Assembling Machine 2
Assembling Machine 3
Distractor Capsules

Okay ... you remember before, when I said robots don't have souls? Well that was technically a lie. Distractor robots do, in fact, have an experimental soul software installed. It doesn't serve any purpose, though. The goal was simply to make them really feel the pain and loss of death when they are terminated after such a short time. It's horrible, I know. But, whatcha gonna do, eh? Ha ha! Whatcha gonna do!
Assembling Machine 2
Assembling Machine 3
Destroyer Capsules

Destroyer capsules do not _have_ souls--they _take_ souls!
Assembling Machine 2
Assembling Machine 3
Module 1s

This creates modules 1s at a good pace. To match my other blueprints, it creates more efficiency modules than anything else. But it's easy to switch any of the assembling machines from any module type to any other type--they all have the same requirements.
Assembling Machine 2
Assembling Machine 3
Module 2s

Module 2s, baby!
Speed, Assembling Machine 2
Speed, Assembling Machine 3
Efficiency, Assembling Machine 2
Efficiency, Assembling Machine 3
Productivity, Assembling Machine 2
Productivity, Assembling Machine 3
Science
Automation Science
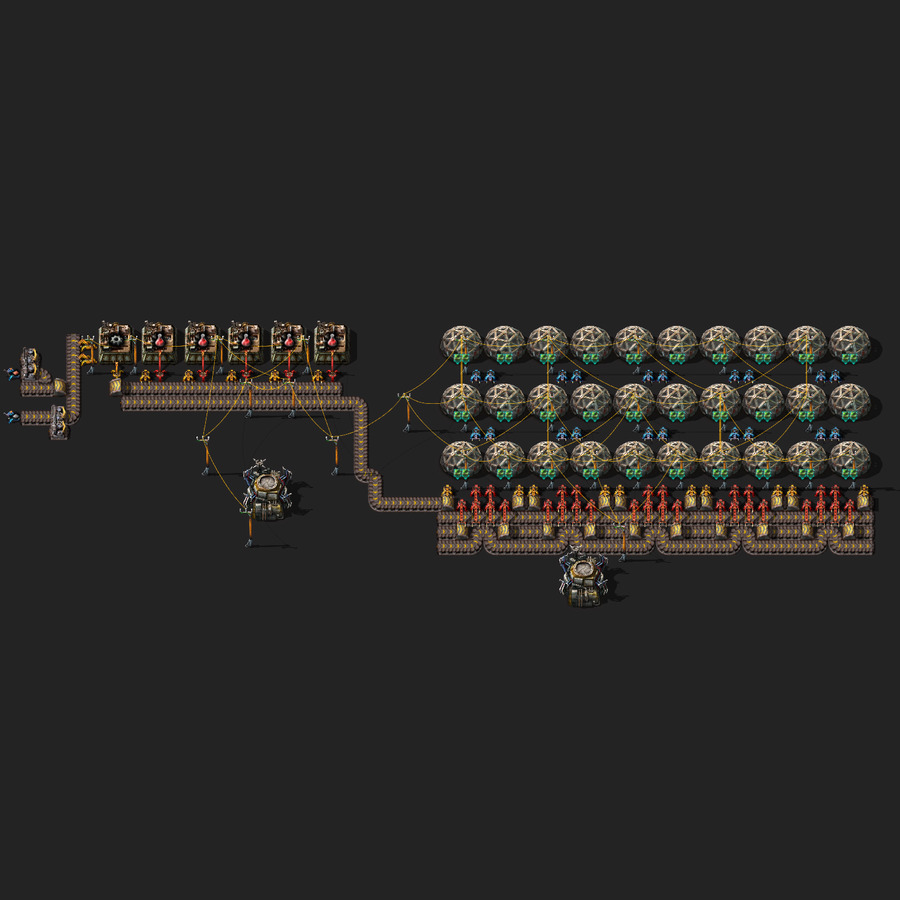
The first of the science blueprints. I designed these to be expandable, so each one builds on the last. They all produce science at the same rate.
Assembling Machine 1
Assembling Machine 2
Assembling Machine 3
Logistic Science
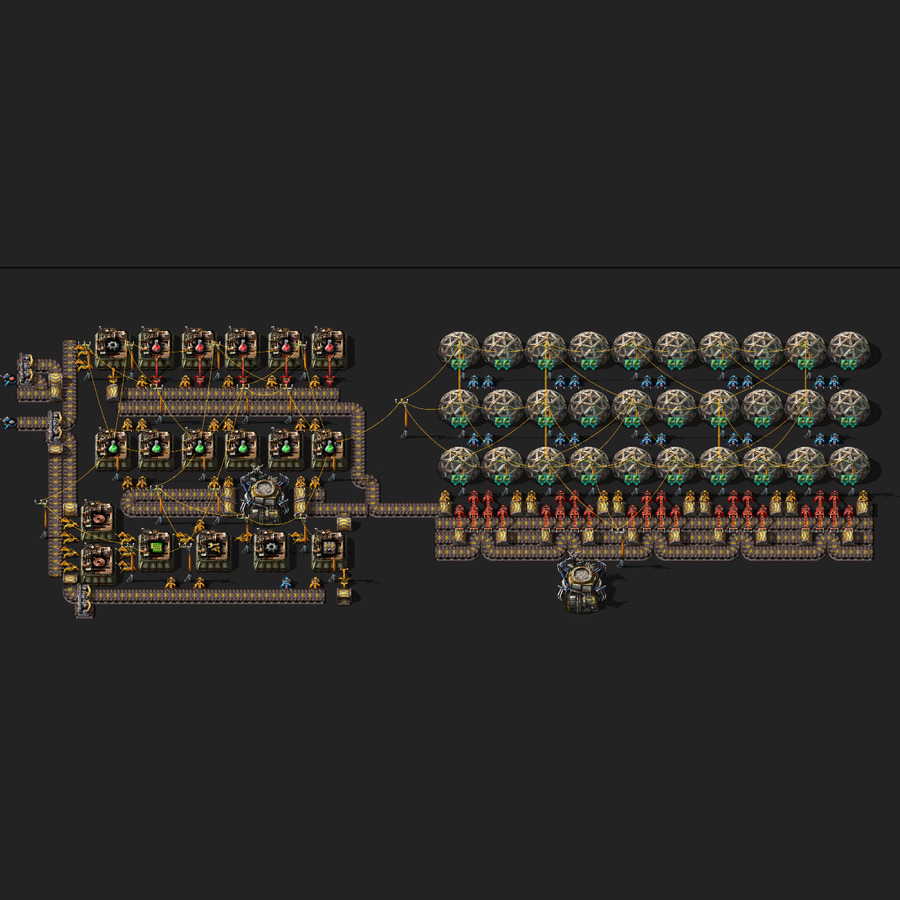
Science level 2 for you, boo! Okay, sorry. I crossed a line. You are not my boo. Rhyming is no excuse for calling you my boo.
Assembling Machine 1
Assembling Machine 2
Assembling Machine 3
Military Science

Science for the blowing up of things.
Assembling Machine 2
Assembling Machine 3
Chemical Science

Chemical science ... what is that exactly? Like chemistry? Why not call it chemistry?
Assembling Machine 2
Assembling Machine 3
Production Science

More science. I have nothing useful to say here.
Assembling Machine 2
Assembling Machine 3
Utility Science

The final of the expandable blueprints! (Psst! You want to know a secret? This thing has too much low density structure production. They changed things in Space Age but I never updated it! I just left it not perfect! Do you know how hard that was for me? Do you know? DO YOU KNOW?!?)
Assembling Machine 2
Assembling Machine 3
Intermediates
Electronic Circuits
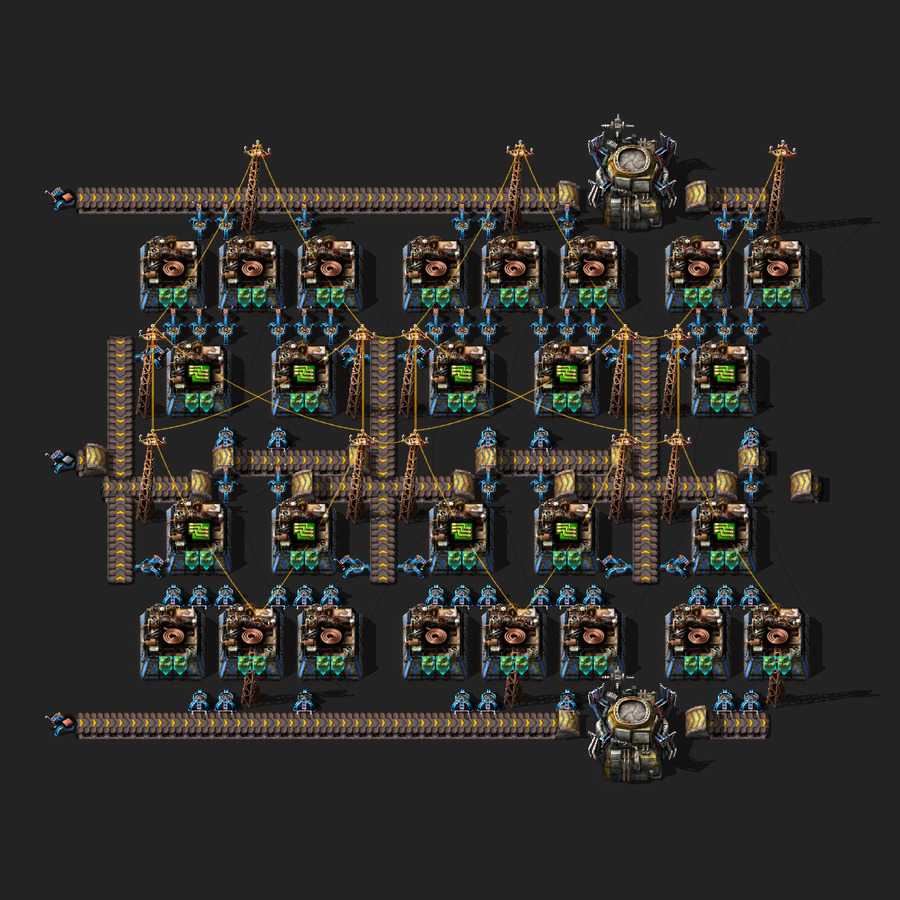
You probably won't need these since they're baked into the other blueprints, but they're here if you want 'em!
AM2 Yellow Belt Through
AM2 Yellow Belt In-Out
AM2 Red Belt Through
AM2 Red Belt In-Out
AM2 Blue Belt Through
AM2 Blue Belt In-Out
AM3 Yellow Belt Through
AM3 Yellow Belt In-Out
AM3 Red Belt Through
AM3 Red Belt In-Out
AM3 Blue Belt Through
AM3 Blue Belt In-Out
Iron Gear Wheels

You also likely won't need these but they are here if you want them.
AM2 Yellow Belt Through
AM2 Yellow Belt In-Out
AM2 Red Belt Through
AM2 Red Belt In-Out
AM2 Blue Belt Through
AM2 Blue Belt In-Out
AM3 Yellow Belt Through
AM3 Yellow Belt In-Out
AM3 Red Belt Through
AM3 Red Belt In-Out
AM3 Blue Belt Through
AM3 Blue Belt In-Out
Plastic Bars

You'll never guess what these make!
Yellow Belt Through
Yellow Belt In-Out
Red Belt Through
Red Belt In-Out
Blue Belt Through
Blue Belt In-Out
Advanced Circuits

Each of these will produce a half-yellow-belt of red circuits. They tend to be long, so if you want more red circuit production I suggest just slapping down more of these blueprints.
AM2 Through
AM2 In-Out
AM3 Through
AM3 In-Out
Sulfuric Acid

Okay, unlike the other intermediate blueprints, this one you might actually want. It's much easier to make this separately since you need to pipe it to miners for uranium.
Blueprint
Processing Unit

Each of these is designed to consume a full belt of green circuits.
AM2 Yellow Belt Through
AM2 Yellow Belt In-Out
AM2 Red Belt Through
AM2 Red Belt In-Out
AM2 Blue Belt Through
AM2 Blue Belt In-Out
AM3 Yellow Belt Through
AM3 Yellow Belt In-Out
AM3 Red Belt Through
AM3 Red Belt In-Out
AM3 Blue Belt Through
AM3 Blue Belt In-Out
Explosives

For when you need to make things to make other things make other things go boom.
Through
In-Out
Concrete

So, let's say you saw a beautiful field of soft grass and vibrant trees and thought, "Yup, it's gotta go." This does that!
Through
In-Out
Electric Engines

Let me ask you a question. Why would a regular engine be required to make an electric engine? That's weird, right? I mean, are the folks at Tesla like, "Shoot, we can't upgrade production because we need more gas-powered engines so we can break them down and then use the parts to create electric engines." I don't get it.
Blueprint
Defense
Tileable Defense Walls

A whole bunch of defense blueprints. These fit with the robot extension and/or railroad segments. The double-rows of laser turrets should be good enough to handle just about any late-game threat, at least on Nauvis.
Straight, Turrets, Right Belt Direction
Straight, Turrets, Left Belt Direction
Straight, Turrets & Lasers, Right Belt Direction
Straight, Turrets & Lasers, Left Belt Direction
Straight, 1 Laser Row
Straight, 2 Laser Rows
Corner, Turrets, Right Belt Direction
Corner, Turrets, Left Belt Direction
Corner, Turrets & Lasers, Right Belt Direction
Corner, Turrets & Lasers, Left Belt Direction
Corner, 1 Laser Row
Corner, 2 Laser Rows
Edge, Turrets, Right Belt Direction
Edge, Turrets, Left Belt Direction
Edge, Turrets & Lasers, Right Belt Direction
Edge, Turrets & Lasers, Left Belt Direction
Edge, 1 Laser Row
Edge, 2 Laser Rows
Inside Corner, Turrets, Right Belt Direction
Inside Corner, Turrets, Left Belt Direction
Inside Corner, Turrets & Lasers, Right Belt Direction
Inside Corner, Turrets & Lasers, Left Belt Direction
Inside Corner, 1 Laser Row
Inside Corner, 2 Laser Rows
Late Game Beaconed Builds
Late Game Beacon Wrapper

You can slap down a whole bunch of these together and then use the blueprints below to ramp up production of various items easily. The only downside is excessive power consumption, but hey, that's what nuclear and fusion power is for, right?
Blueprint
Late Game Beaconed Builds

A whole bunch of blueprints for scaling up production of various items. There will likely be items you want that are missing here, but it should be easy to use one of the existing blueprints as ... uh ... a blueprint ... for making anything you want.
Iron Gear Wheel
Copper Wire
Plastic
Green Circuit
Red Circuit
Blue Circuit
Speed Module 1
Efficiency Module 1
Productivity Module 1
Speed Module 2
Efficiency Module 2
Productivity Module 2
Beacon
Low Density Structure
Rocket Silo
Engine Unit
Electric Engine Unit
Pipe
Underground Pipe
Space Platform Starter Pack
Space Platform
Cargo Bay
Asteroid Collector
Crusher
Thruster
Rocket Launcher
Rocket Turret
Cargo Landing Pad
Lab
Cliff Explosives
Barrel
Grenade
Exposive
Sulfur
Automation Science
Logistic Science
Inserter
Transport Belt
Battery
Personal Battery
Personal Battery Mk2
Personal Battery Mk3
Heating Tower
Stone Furnace
Bioler
Heat Pipe
Artillery Turret
Artillery Shell
Radar
Solar Panel
Accumulator
Military Science
Piercing Rounds
Firearm Magazine
Wall
Late Game Beaconed Foundry Builds

Some useful blueprints for getting that sweet, sweet productivity bonus from foundries.
Iron Plate
Steel Plate
Iron Gear Wheel
Copper Plate
Copper Wire
Iron Stick
Low-Density Structure
Space
Space Foundation
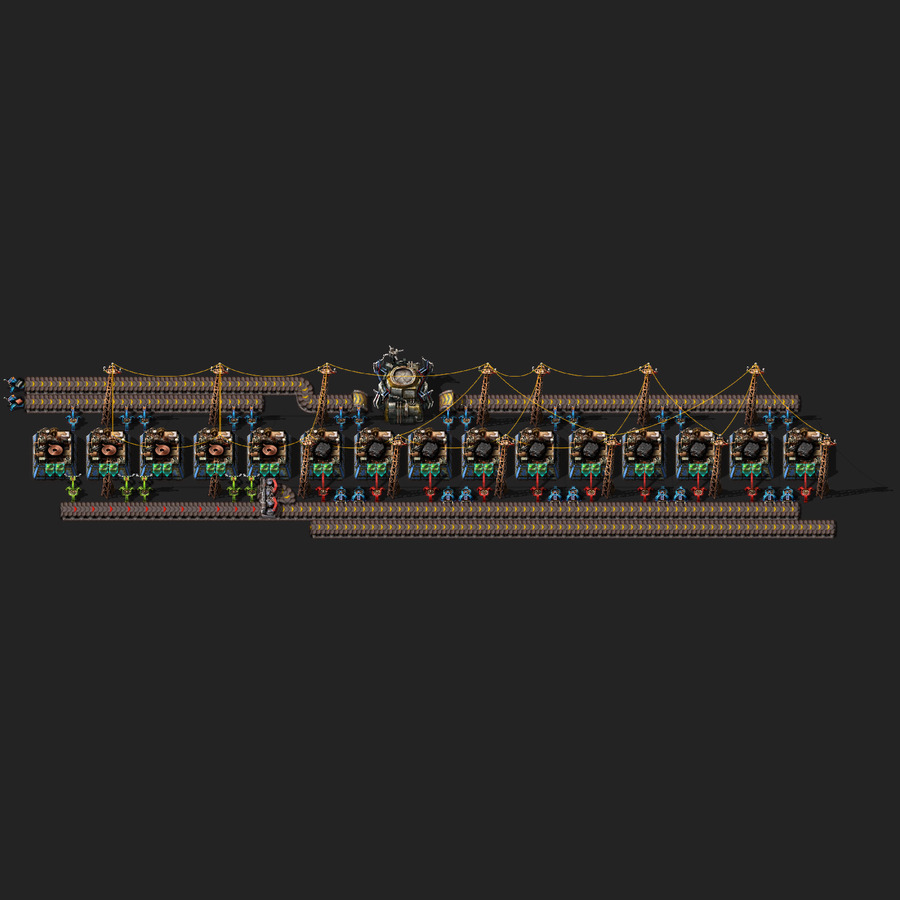
These will make space foundation so you can leave that crummy-old planet and go ruin some others, too!
AM2 Through
AM2 In-Out
AM3 Through
AM3 In-Out
Initial Rocket Silos

You can use this to create that initial space science platform and such, for manually launching rockets. I recommend upgrading to the one below at a certain point, since you'll need a lot of rockets!
AM2
AM3
Rocket Silos

You can tile these to create an area that can launch many rockets. I don't recommend using it for your first rocket, but once you need to scale up this should do the trick!
Blueprint
Space Science

A nice, simple blueprint for getting space science. It's fairly minimal and produces well. I really like this one! If you need to scale up, just create a few more.
Blueprint
Inner Planet Transport

You can use this to travel between Nauvis, Vulcanus, Gleba, and Fulgora. Don't try to go to Aquilo or beyond or you will have a bad day. This will slow itself down if it runs low on ammo, so you can mostly set it and forget it.
Blueprint
Aquilo Transport

This will handle travel to the inner planets or Aquilo. It's got some decent features: it will slow down when going to / from Aquilo if low on ammo, if you have excess space rocks it will recycle whichever one you have most of, and it has a decent amount of cargo space.
Blueprint
Edge & Beyond

This will go out to the Solar System Edge and can go beyond it (at least, you know, a little). It's not _great_ so you may have to babysit it some. It has features similar to the Aquilo Transport.
Blueprint
Vulcanus
Solar Block

A solar block optimized for Vulcanus. Solar works pretty well on Vulcanus so it's not a bad choice.
Blueprint
Simple Coal Liquefaction

Use this to get oil products going on Vulcanus. You can upgrade to the normal Coal Liquefaction blueprint below once you've researched it.
Blueprint
Coal Liquefaction (Vulcanus)

Make that coal into oil products! This version is just like the Nauvis version but with minor modifications to work well on Vulcanus (like using sulfuric acid). You'll need to kick start it with some heavy oil and some fuel in the biolers, but once you've done that it runs on it's own.
Blueprint
Molten Iron

I'm looking at this blueprint and, you know, there's just something about it. Something like, mhm, yeah, you go blueprint. One could say it's ... hot! The stone this produces will need to be handled, so that means either turning it into stone brick or just dumping it in lava (preferably both--send it to stone bricks until that backs up and then send the rest to the lava).
Blueprint
Molten Copper

*Sizzle* Still hot!
Blueprint
Low Density Structure (Vulcanus)

Helps to make those rockets so you can get off this hellscape!
Blueprint
Rocket Fuel (Vulcanus)

Rockets are all like "Zoom zoom pew pew" and I like that, you know? I like that.
Blueprint
Processing Unit (Vulcanus)

When the chips are down ... maybe just pick them back up? Then put them in a rocket. Then fly away. Just make sure they're blue.
Blueprint
Metallurgical Science Pack
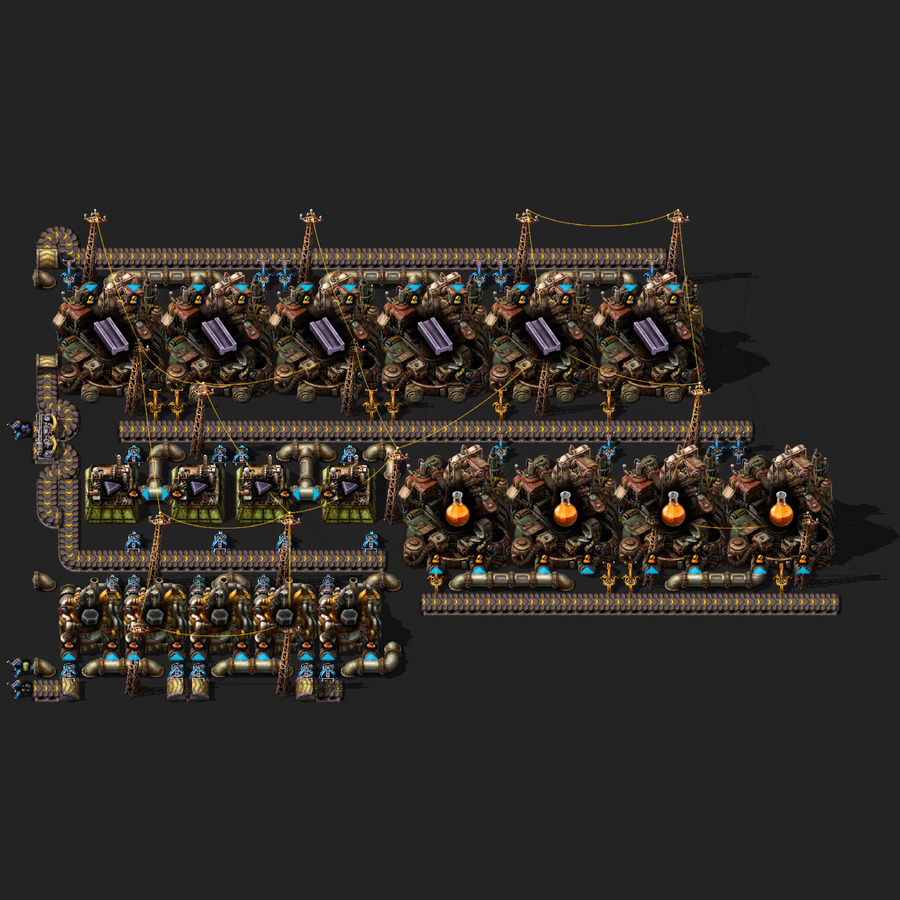
Makes the Vulcanus science pack at a decent-ish rate.
Blueprint
Foundry

This makes foundries! I like foundries. This assumes you are using robots. You should definitely be using robots.
Blueprint
Big Mining Drill

When you want to show those ores who's boss.
Blueprint
Tungsten Carbide
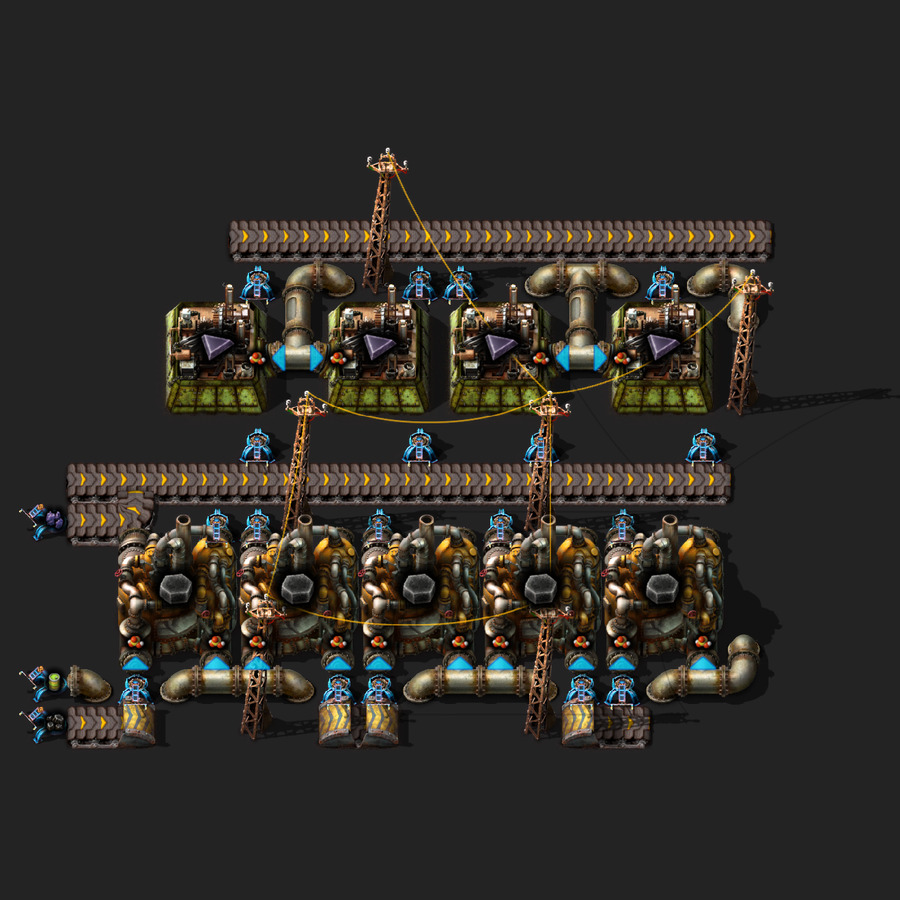
Makes tungsten carbide for off-world shipping.
Blueprint
Tungsten Plate

Makes tungsten plate for off-world shipping (or on-world green belt production). The smaller blueprint (shown) only makes a few but the larger one produces quite a lot and you'll probably want to use it if you plan to make green belts. Also, you should plan to make green belts.
Some
Lots
Turbo Belts

This makes those handy green belts! I definitely recommend producing them. Vulcanus can make them fairly easily and they are useful for late-game ships if for nothing else.
Blueprint
Fulgora
Small Power Block

This will harvest that lightning into power! I recommend doing something like this and scaling up as you can for power on fulgora as that seems to work best.
Blueprint
Big Power Block

Something this size is really nice for getting lots of power, but you may have trouble figuring out where to place it, so you might want to use the small one.
Blueprint
Steam Power

As an alternate to lightning power, you can use this. It's less resource-intensive and produces decent output so it might be the better option, but, hey, that's up to you!
Blueprint
Storage Block

My fulgora blueprints rely heavily on robots and on having enough logistics storage, so you'll want 1 (or 2 or 3 or 4) of these for sure.
Blueprint
Recycling Line

Takes in scrap, sends out precious, precious resources! This uses active provider chests to get rid of items quickly. The reprocessing center below will handle it from there!
Yellow Scrap Belt
Two Yellow Scrap Belts
Red Scrap Belt
Two Red Scrap Belts
Reprocessing Center

Uses circuits and robots to reprocess items, but only when needed! Circuits are used to only send items to reprocessing if you have too many of them. One of these is optmized to fully handle the output of the "Two Red Scrap Belts" Recyling Line blueprint (assuming no upgrades). This makes sure your resources don't back up and stop all production but also makes sure you aren't reprocessing things that you need!
Blueprint
Rocket Fuel (Fulgora) (Tileable)

A tileable rocket fuel blueprint. This is all you need to create stuff for rockets, since you pull blue chips and low density structures straight out of the ground. Man, I love Fulgora--don't you love Fulgora? Stupid Gleba _wishes_ it was as cool as Fulgora.
Blueprint
Recyclers

Makes recyclers. 'Nuff said. Well, I didn't actually say "'Nuff" but pretend I did.
Blueprint
Holmium Plates

A little known fact: holmium plates were named for Sherlock Holms. Not Sherlock Holmes, that's a totally different dude.
Blueprint
Electromagnetic Plants

These aren't anything like other plants, like the cactus or the fern.
Blueprint
Accumulators (Fulgora)

I find it helpful to make these on-planet so you can easily expand your power capacity.
Blueprint
Lightning Rods

Makes lightning rods. Also contains a lightning rod. Which came first, the lightning rod machine or the lightning rod?
Blueprint
Substations (Fulgora)

Like the accumulators, I find it helpful to build these on Fulgora to easily expand the power grid.
Blueprint
Superconductors

You'll need these both on- and off-planet.
Blueprint
Supercapacitors

Cuz regular capacitors are, like, so boring.
Blueprint
Electromagnetic Science Pack

Once you've built this, you're just about there! You've beaten Fulgora! Congratulations! But, uh, don't forget Tesla turrets. You know, if you want them. They might be a big help on Gleba. Frickin' Gleba.
Blueprint
Tesla Turrets

These might be a good investment for Gleba defense. Their power usage is insane but so is their damage.
Blueprint
Gleba
Solar Block (Gleba)

Definitely don't rely on solar on Gleba in the long run. But you may want something like this to kickstart everything. It's ratios are optimized for Gleba.
Blueprint
Burner Power

This performs two very important roles: 1) it gives you power and 2) it disposes of materials you will want to get rid of. The initial blueprint will make sure to burn pentapod eggs, optionally burn rocket fuel when you're low on heat, and burn other items if you have too many in logistics storage. The expander just adds more burning of materials if you have too many of them. The expander (rocket fuel) adds more rocket fuel burning if your normal resources aren't enough to power things (I haven't really needed to use this, though). I have found this to work pretty well for power on Gleba all on it's own, once it gets going, and it can even support laser and tesla turrets and such.
Initial
Expander
Expander (Rocket Fuel)
Harvesting

A simple harvesting blueprint for either Yumako or Jellynut. The requestor chest requests seeds.
Yumako
Jellynut
Nutrients & Seeds

This produces nutrients for powering things and seeds for replanting. Like all my Gleba blueprints, it relies on robots. I find using robots to be _extremely helpful_ on Gleba. It keeps things simple and compact and Gleba seems to have no trouble powering this setup.
Blueprint
Agricultural Science

You'll need to kickstart this with a couple of pentapod eggs. In theory, this should never let a pentapod egg spoil and spawn a bug. I've also never seen it happen in practice so it seems pretty safe. Oh, yeah, also this creates science or something.
Blueprint
Iron Plate (Gleba)

This kick starts itself, isn't wasteful, and ... and I just love it, okay? I'm really proud of it. Someone affirm me, already.
Blueprint
Copper Plate (Gleba)

I love this one, too! *Chef's kiss*!
Blueprint
Steel Plate (Gleba)

Very simple (and kinda wasteful, power-wise) steel plate smelting.
Blueprint
Plastic Bar (Gleba)
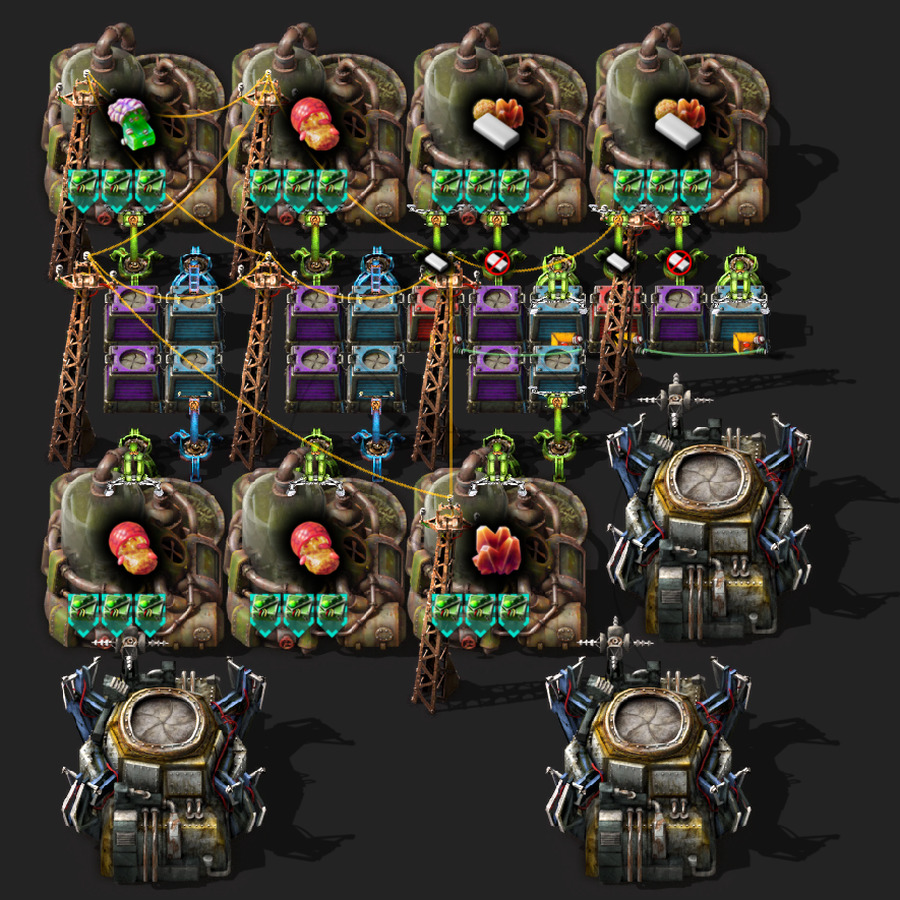
Organic plastic, I guess? I don't get it.
Blueprint
Electronic Circuits (Gleba)

Simple green circuit production.
Blueprint
Advanced Circuits (Gleba)

Red circuits or something I dunno I'm tired of writing these.
Blueprint
Landfill

You'll definitely need plenty of this on Gleba. You can choose belt-fed or robot-fed.
Robot-Fed
Belt-Fed
Biochamber

Biochamber production that should be safe from pentapod egg spoilage. You'll have to kickstart it with a couple of pentapod eggs.
Blueprint
Rocket Fuel (Gleba)

Why can't Gleba be more like Fulgora and make rocket fuel super easily?
Blueprint
Low Density Structure (Gleba)

Why can't Gleba be more like Fulgora and make low density structures super easily?
Blueprint
Processing Units (Gleba)

Why can't Gleba be more like Fulgora and make processing units super easily?
Blueprint
Carbon Fiber

Carbon fiber for export to make cool things. Or, whatever you want. Send it to Vulcanus and then burn it in lava, what do I care?
Blueprint
Stack Insert

You'd think stack inserters would be really cool. But, actually, they're total dorks. They're always going on about their stamp collections and stuff. Geez, stack inserters. Get a life.
Blueprint
Death Hub

For killing the big bugs. This does a decent job but uses a LOT of power. But that's what the "Defense Support Array" below is for! I don't suggest using walls on Gleba cuz those dang monsters just walk over them.
Blueprint
Defense Support Array

One Death Hub can consume the power of two of these. So you might want a couple to make sure you can support spiky power usage if you are using the Death Hub above for defense.
Blueprint
Bioflux

Bioflux for export.
Blueprint
Aquilo
Solar Kick Start (Aquilo)

You'll need something to kickstart the power on Aquilo. Just put a few of these down and then focus on getting the more useful power blocks below going--then you can remove these.
Blueprint
Power Starter (Aquilo)

This isn't 100% necessary, but it will make life a whole lot easier. Heating towers take forever to get going. I'd suggest putting this down first and manually putting nuclear fuel in it. Once it gets going, robots will feed it but only if the heat gets too low (so you should need little or no fuel because the heating towers will take over).
Blueprint
Fire & Ice Power

It's a bit tough to get the first one going, but once it starts these work well for providing power and heat. Just add more if you need more power. But be careful to do it slowly or you'll suck all the heat away and your power will immediately die. This is tileable.
Blueprint
Ice Platform
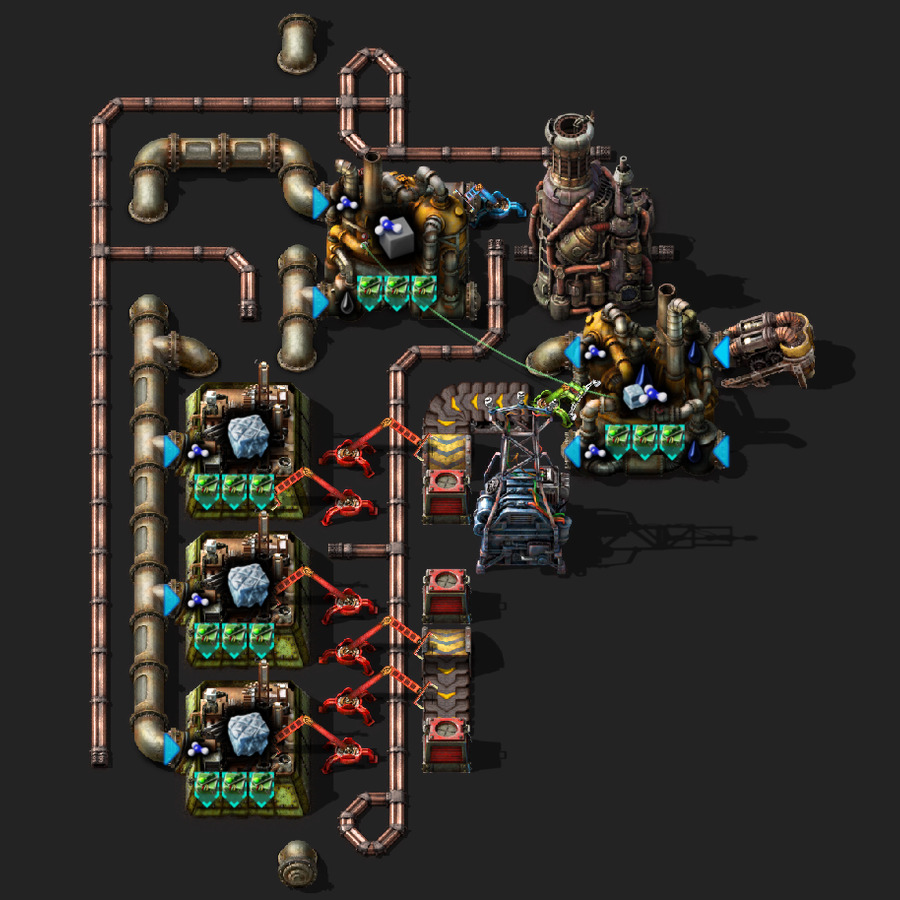
Produces ice platform and a little bit of heat. This is tileable with itself and the "Fire & Ice Power" blueprint.
Blueprint
Cryogenic Plants

This will produce cryogenic plants. I am out of silly or clever things to say.
Blueprint
Fluoroketone

This make fluro--uh, I mean flouro--uh, I mean fluoru--Look! Nobody sane can spell this the first time! Anyway, whatever it makes, it makes it good. And it's smart enough to shut down production and not over fill the tanks, so you should always have plenty of this but never backup the cryogenic plants that are cooling the liquid.
Blueprint
Cryogenic Science

Aquilo science. Cool! (Get it?)
Blueprint
Quantum Processor
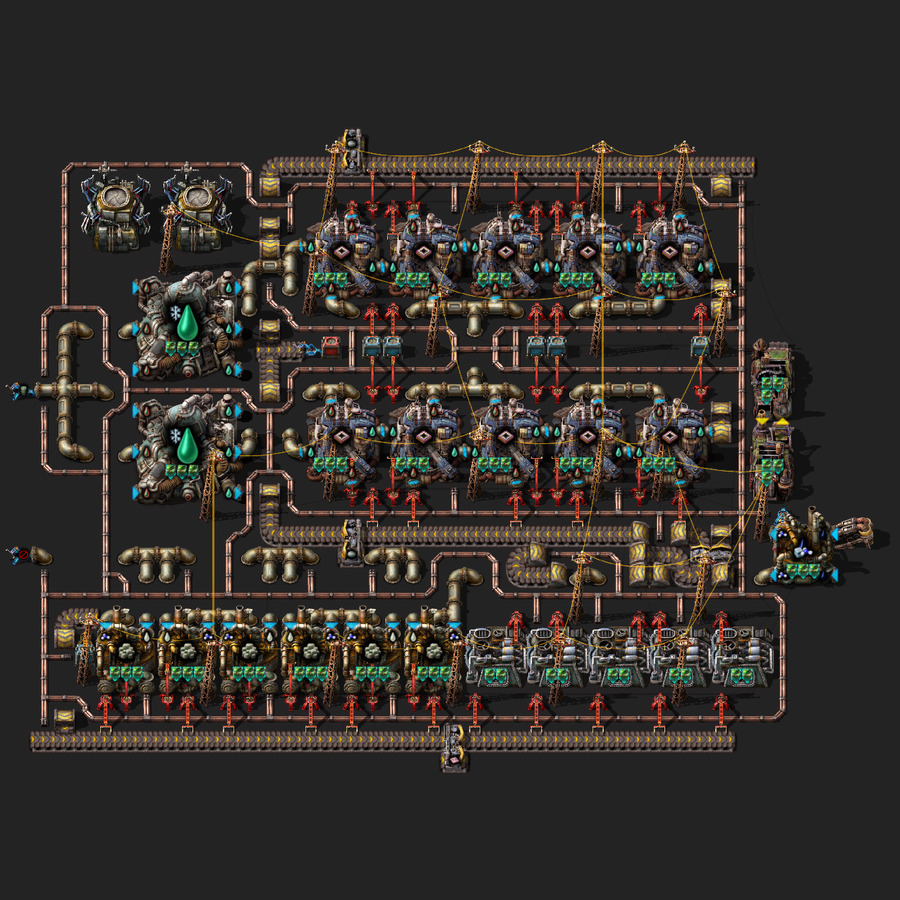
Apparently, all we need on earth to finally get quantum computing out of it's infancy is some place really, really cold. If it works in Factorio, it must be true!
Blueprint
Fusion Fusion

A fusion of fusion-based power items.
Blueprint
Railgun Turret

The only way to advance beyond the limits of your reach into space: Even. Bigger. Guns.
Blueprint
Fluoroketone Cold Barrel

You'll need at least a little of this stuff for kickstarting fusion power on the "Edge and Beyond" ship or on other planets, so here's a little blueprint for ya! It won't make too many.
Blueprint
Rocket Silo

A tileable rocket silo blueprint for Aquilo.
Blueprint